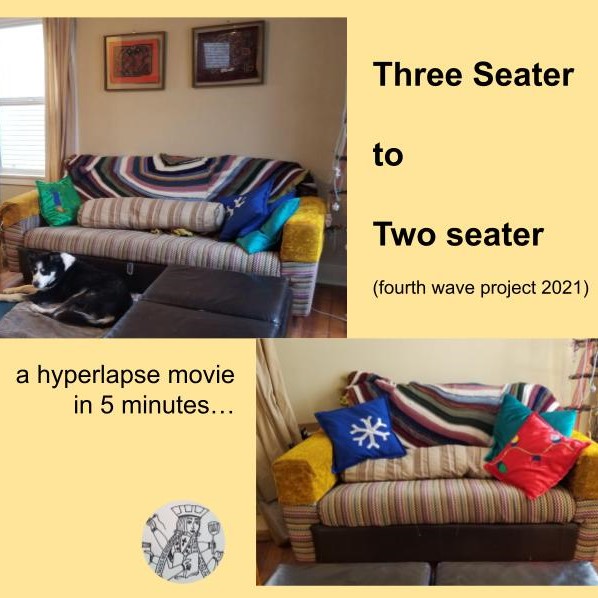
Couch Reimagined
We found a matching pair to our 1960’s lazy boy for $50. Problem: our couch now didn’t fit in the living room – with the two chairs. Time to get the DIY on 🙂
The wonderful thing about social media is that you get to cut out all the hard bits. It got done, not as smoothly as one might imagine from watching the 5 minute summary. As always, however, I learned a lot and if I could ever get myself to repeat the same project twice it would go better next time.
As I was working away on this and watching the video clips I was thinking… upholstery seems to me one of those DIY’s that people shy away from. Maybe because you have to have some competence at sewing and fabric and also some experience with carpentry and wood. Really though, the tools needed are fairly simple and the sewing and carpentry skills pretty basic. This couch was already 12 years old and had been reupholstered once already making it pretty well useless as a re-sell or donate and likely headed to the landfill. As a result I felt I had little to lose. That said, about half way through I went out and spent $200 on new foam for the seat so after that I HAD to finish. This motivation helped me on day 3 when I had to cut off an extra 1/4 inch, twice, in order to get it to fit into the original hardware (that debacle isn’t in the video).
I guess what I am saying is, I think you should go for it. If you have an old piece of furniture or need a new accent or conversation piece for your living room. Things to consider:
It’s not going to look like the origional unless you’ve got a lot of experience or want to hire the pros. I have very little attachment to perfection (one of the wonderful things about living ram shackle wartime housing is the lack of expectations) – so this project matches perfectly with the rest of the patchwork that is our interior.
The origional quality of your furniture is key. You can achieve this by buying old (see… 1960’s lazyboy x2) or by spending more money origionally. This sofa cost us $800 twelve years ago. I had already taken it apart once so I more or less knew how it was constructed. This was the ultimate test of it’s quality and versatility however – if it can become a mostly different piece of furniture.
Take notes, or pictures, or keep close track as you take it apart. This includes keeping all the hardware together or labeled. Most pieces of furniture aren’t that complicated and if you follow the screws (start with whatever seems accessible) and then put it back together in the same order you can do it.
What do you get for your effort? A deep sense of satisfaction and a large portion of materials NOT in a landfill. Another thing to consider if you have an old sofa is to just take it apart and separate the parts into burnable, reusable, and garbage. I spoke to a friend today who did this once and actually ended up with a pretty small pile of actual garbage once the old sofa was dismantled. The foam in the seat cushions can be washed and reused as pillows or torn up to re-stuff the old teddy bears. Furniture foam is expensive (see…$200 in new foam) and NOT biodegradable so it is worth recovering.
Have any questions? Ask in the chat. I’d love to talk with you about this project.
…try new things, fix stuff, get your hands dirty, read about everything and live life the most that you possibly can while still being as kind as possible – to people and to the world around you.


2 Responses